
Complete Guide: Setting Up a Peplink Router to Use Starlink as WAN
Integrating a Peplink router with Starlink enhances internet connectivity by combining satellite and cellular networks, ensuring a more reliable and seamless online experience.
Note: The specific steps may vary depending on your Peplink router model and firmware version.
1. Physical Setup
-
Connect Starlink to Peplink:
- Use an Ethernet cable to connect the Starlink terminal to a WAN port on your Peplink router.
-
Power Considerations:
- Ensure both devices are properly powered.
- For mobile installations, consider power requirements and the potential need for inverters or DC power solutions.
2. Peplink WAN Configuration
-
Access Peplink Web Admin Interface:
- Open a web browser and navigate to the Peplink router's IP address (commonly
192.168.50.1). - Log in with your admin credentials.
- Alternatively, you can remote web admin into the device using InControl2.
- Open a web browser and navigate to the Peplink router's IP address (commonly
-
Configure WAN Settings:
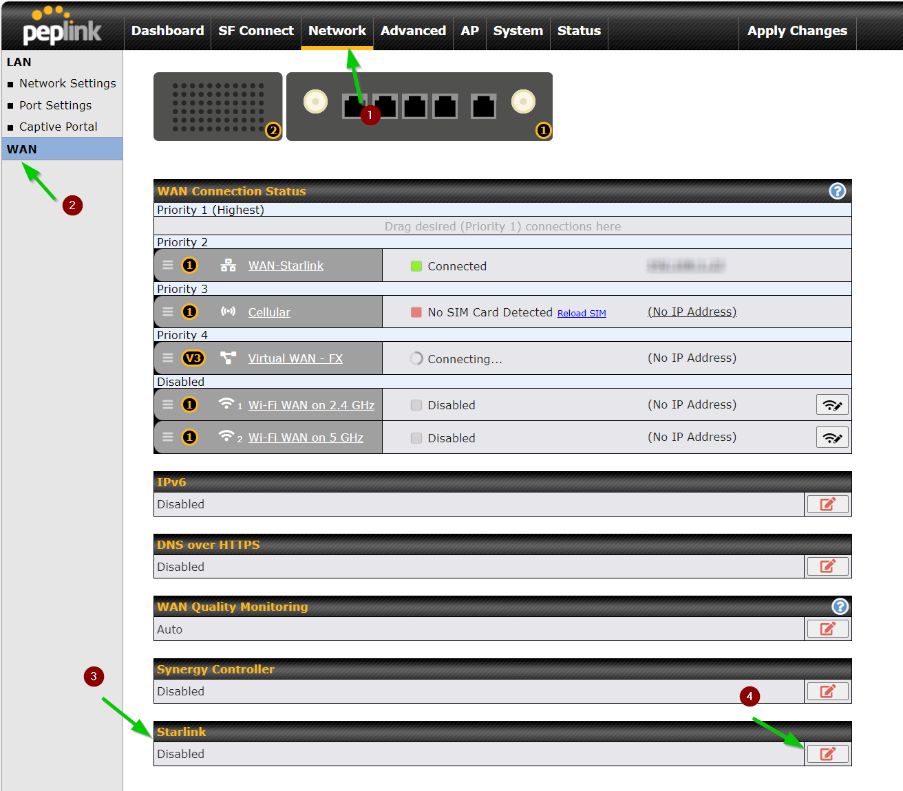
- Navigate to Network > WAN.
- Select the WAN port connected to Starlink.
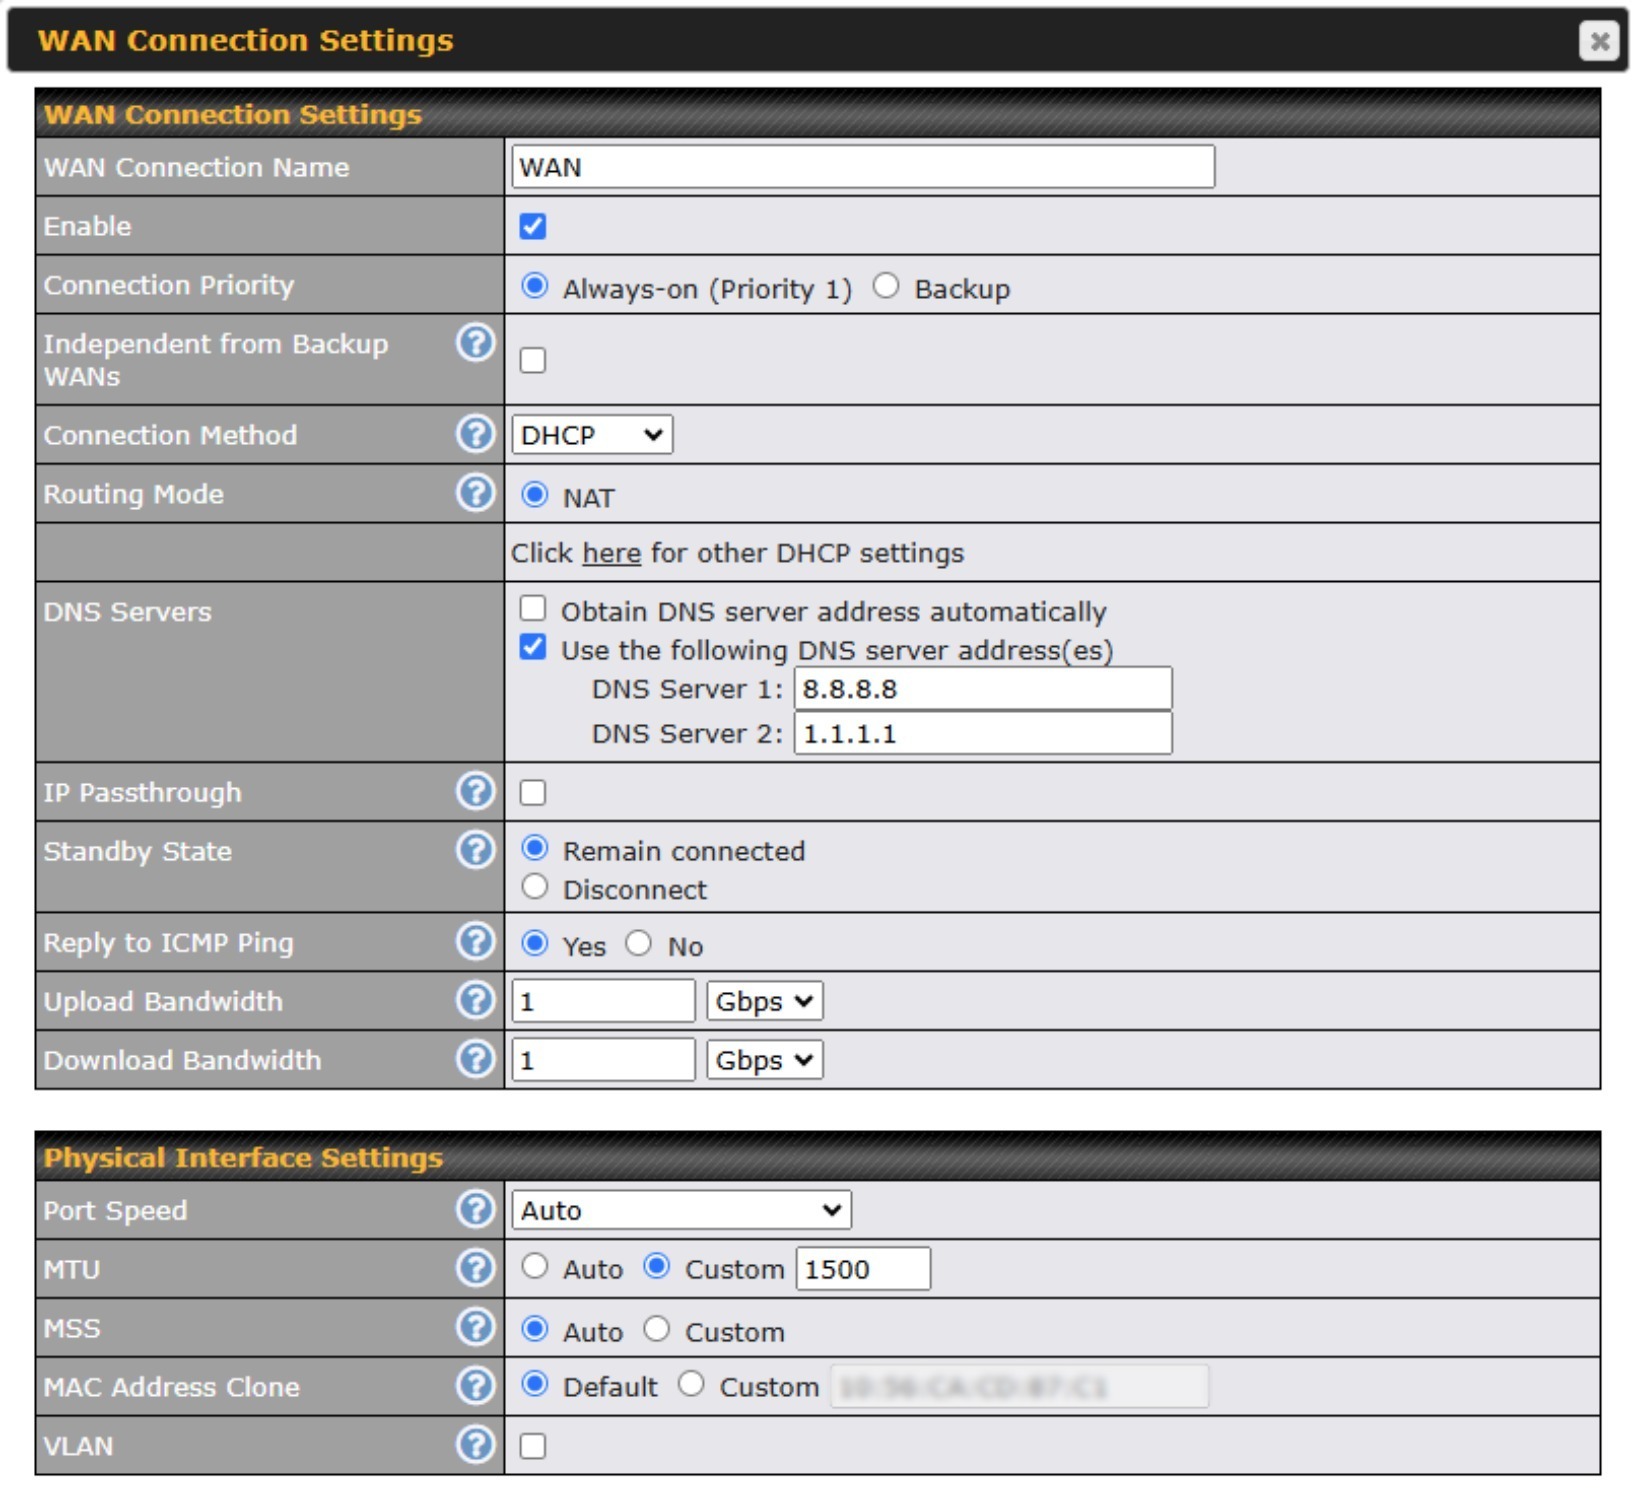
- Set Connection Method to
DHCP. - (Optional) Manually specify DNS servers, such as
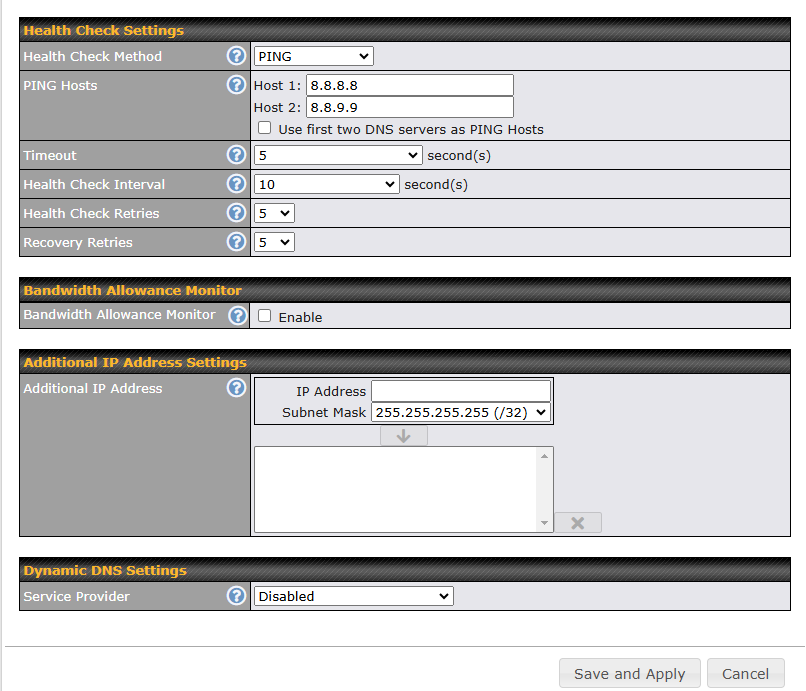
8.8.8.8and1.1.1.1. - Enable Health Check using the PING method to monitor connection stability.
-
Save and Apply Settings:
- Click Save and then Apply Changes to update the configuration.
3. Prioritize WAN Connections
-
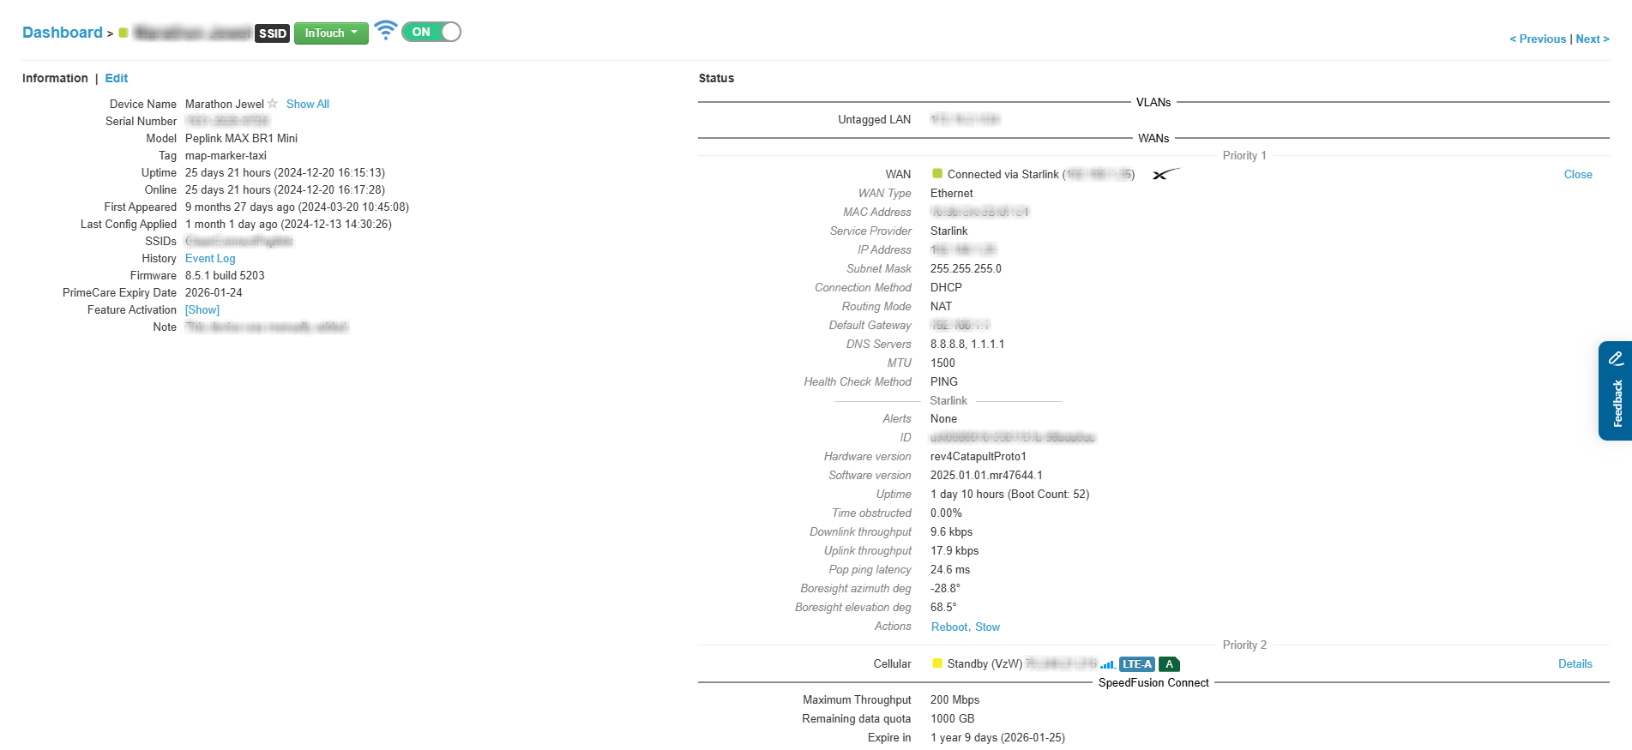
Set Connection Priorities:
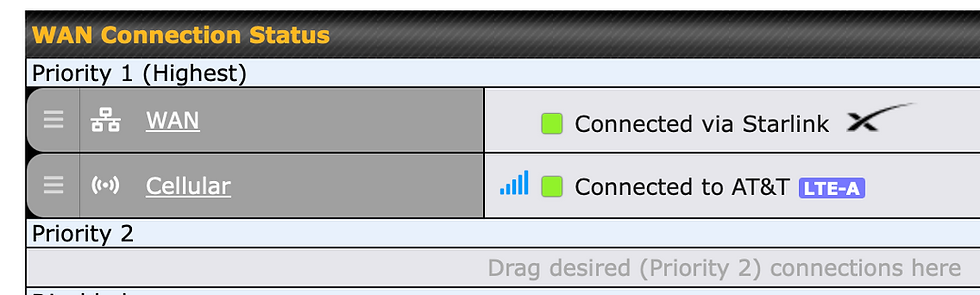
- In the Dashboard, drag and drop WAN connections to set their priority order.
- Place Starlink in Priority 1 for primary use, with cellular connections as backups.
-
Configure Failover Settings:
- Ensure that Failover is enabled to automatically switch to backup connections if Starlink becomes unavailable.
4. Advanced Configuration (Optional)
-
Outbound Policy:
- Navigate to Network > Outbound Policy.
- Set rules to direct specific traffic types through preferred WAN connections.
-
SpeedFusion Setup:
- If your Peplink device supports SpeedFusion, configure it to bond multiple WAN connections for enhanced performance and reliability.
5. Monitoring and Maintenance
-
Monitor Connection Status:
- Use the Status tab to view real-time information on WAN connections.
-
Firmware Updates:
- Regularly check for and apply firmware updates to ensure optimal performance and security.
6. Allow access to GPS location data on the local network
-
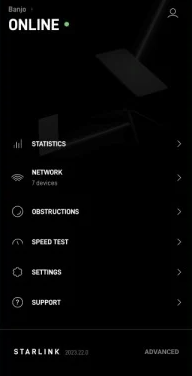
Open the Starlink App:
- Launch the Starlink app on your mobile device.
-
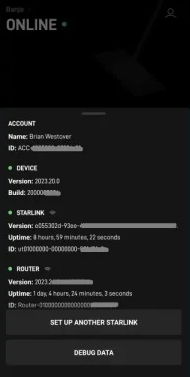
Select your Starlink unit:
- Choose the Starlink that you will be working with.
-
Access Advanced Options:
- In the Settings menu, select Advanced.
-
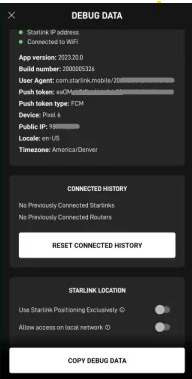
Go to Debug Data:
- Under Advanced, locate and tap on Debug Data.
-
Find the Starlink Location Section:
- Scroll down to the Starlink Location section.
-
Enable Local Network Access:
- Toggle the Allow Access on Local Network switch to the On position.
-
Verify the Change:
- Confirm that the toggle remains enabled. This will allow devices on your local network to access your Starlink dish's GPS location data.
Additional Resources
-
Peplink's Starlink Integration Guide: Provides detailed instructions and considerations for integrating Starlink with Peplink devices. Link
-
SeaBits Guide on Using Starlink with Peplink: Offers insights and practical advice on combining these technologies for enhanced connectivity. Link
-
MobileMustHave's Peplink and Starlink Integration: Features setup videos and wiring diagrams for various configurations. Link
-
Webinar on Linking up Starlink with Peplink: A visual demonstration of the integration process. Link
-
West Networks Starlink Configuration Walkthrough: A visual demonstration of the configuration process. Link
-
5G Store Starlink Configuration Walkthrough: A visual demonstration of the configuration process. Link
By following this guide, you can effectively integrate your Peplink router with Starlink, creating a robust and reliable internet setup suitable for various applications, including remote work and mobile connectivity.